स्किल्स पर वापस
RunVSAgent
wecode-ai द्वारा
Cline—अभी तक कोई रेटिंग नहीं
आपकी रेटिंग
संक्षिप्त
Run VSCode-based coding agents and extensions seamlessly within other IDE platforms - bridging the gap between VSCode ecosystem and other development environment.
विवरण
# RunVSAgent
English | [简体中文](README_zh.md)
[](https://opensource.org/licenses/Apache-2.0)
[](https://nodejs.org/)
[](https://www.jetbrains.com/)
> **Run VSCode-based Coding Agents in Other IDE platforms**
RunVSAgent is an innovative cross-platform development tool that enables developers to run VSCode-based coding agents and extensions within JetBrains IDEs (IntelliJ IDEA, WebStorm, PyCharm, etc.) or other IDE platforms.
## 📸 Screenshot

## 🚀 Core Features
- **VSCode Agent Compatibility**: Seamlessly run VSCode-based coding agents in JetBrains IDEs
- **Cross-IDE Development**: Unified agent experience across different IDE platforms
## 🤖 Supported Agents
- **[Roo Code](https://roocode.com)**: Advanced AI-powered coding assistant with intelligent code generation and refactoring capabilities
- **[Cline](https://cline.bot)**: Autonomous coding agent right in your IDE, capable of creating/editing files, executing commands, using the browser, and more with your permission every step of the way.
- **[Kilo Code](https://kilocode.ai)**: Open-source VS Code AI agent
## 🔧 Supported IDEs
### Jetbrains IDEs
RunVSAgent currently supports the following JetBrains IDE series:
- **IntelliJ IDEA** (Ultimate & Community)
- **WebStorm** - JavaScript and TypeScript development
- **PyCharm** (Professional & Community) - Python development
- **PhpStorm** - PHP development
- **RubyMine** - Ruby development
- **CLion** - C/C++ development
- **GoLand** - Go development
- **DataGrip** - Database development
- **Rider** - .NET development
- **Android Studio** - Android development
> **Note**: Requires JetBrains IDE version 2023.1 or later for optimal compatibility.
## 🏗️ Architecture
```mermaid
graph TB
subgraph "JetBrains IDE"
A[JetBrains Plugin<br/>Kotlin]
B[UI Integration]
C[Editor Bridge]
end
subgraph "Extension Host"
D[Node.js Runtime]
E[VSCode API Layer]
F[Agent Manager]
end
subgraph "VSCode Agents"
G[Coding Agent]
end
A <-->|RPC Communication| D
B --> A
C --> A
E --> D
F --> D
G --> E
```
**Architecture Components**:
- **JetBrains Plugin**: Kotlin-based IDE plugin for JetBrains IDE integration
- **Extension Host**: Node.js runtime environment providing VSCode API compatibility layer
- **RPC Communication**: High-performance inter-process communication for real-time data exchange
- **VSCode Agents**: Various coding agents and extensions developed for the VSCode platform
## 📦 Installation
### [Download from JetBrains Marketplace](https://plugins.jetbrains.com/plugin/28068-runvsagent) (Recommended)
**Recommended Method**: We recommend downloading and installing the plugin from JetBrains Marketplace first, as this is the most convenient and secure installation method.
1. **Online Installation**:
- Open your JetBrains IDE (IntelliJ IDEA, WebStorm, PyCharm, etc.)
- Go to `Settings/Preferences` → `Plugins`
- Search for "RunVSAgent" in the `Marketplace` tab
- Click the `Install` button
- Restart your IDE when prompted
2. **Verify Installation**: After restart, you should see the RunVSAgent plugin in your IDE's plugin list
### Download from GitHub Releases
You can download the pre-built plugin from our GitHub releases page:
1. **Download Plugin**: Visit the [GitHub Releases](https://github.com/wecode-ai/RunVSAgent/releases) page and download the latest plugin file (`.zip` format)
2. **Install in JetBrains IDE**:
- Open your JetBrains IDE (IntelliJ IDEA, WebStorm, PyCharm, etc.)
- Go to `Settings/Preferences` → `Plugins`
- Click the gear icon ⚙️ and select `Install Plugin from Disk...`
- Select the downloaded `.zip` file
- Restart your IDE when prompted
3. **Verify Installation**: After restart, you should see the RunVSAgent plugin in your IDE's plugin list
### Build from Source
#### Prerequisites
- Node.js 18.0+
- JetBrains IDE 2023.1+
- Git
- JDK 17+
#### Build Steps
```bash
# 1. Clone the repository
git clone https://github.com/your-org/RunVSAgent.git
cd RunVSAgent
# 2. Setup development environment
./scripts/setup.sh
# 3. Build the project
./scripts/build.sh
# 4. Install plugin
# Plugin file located at: jetbrains_plugin/build/distributions/
# In IDE: Settings → Plugins → Install Plugin from Disk
```
#### Development Mode
```bash
# Start extension host in development mode
cd extension_host
npm install
npm run dev
# Run JetBrains plugin in development mode
cd jetbrains_plugin
./gradlew runIde
```
## 👥 Developer Information
### Project Structure
```
RunVSAgent/
├── extension_host/ # Node.js Extension Host
│ ├── src/ # TypeScript source code
│ │ ├── main.ts # Main entry point
│ │ ├── extensionManager.ts # Extension lifecycle management
│ │ ├── rpcManager.ts # RPC communication layer
│ │ └── webViewManager.ts # WebView support
│ └── package.json # Node.js dependencies
├── jetbrains_plugin/ # JetBrains Plugin
│ ├── src/main/kotlin/ # Kotlin source code
│ │ └── com/sina/weibo/agent/
│ │ ├── core/ # Core plugin functionality
│ │ ├── actions/ # IDE actions and commands
│ │ ├── editor/ # Editor integration
│ │ └── webview/ # WebView support
│ └── build.gradle.kts # Gradle build configuration
└── scripts/ # Build and utility scripts
```
### Technology Stack
- **Extension Host**: Node.js 18+, TypeScript 5.0+
- **JetBrains Plugin**: Kotlin 1.8+, IntelliJ Platform 2023.1+
- **Communication**: RPC over Unix Domain Sockets/Named Pipes
- **Build Tools**: npm/pnpm, Gradle, Shell scripts
### Known Issues
For a list of known issues and common problems, please see [Known Issues](docs/KNOWN_ISSUES.md).
### Contributing
1. Fork the repository
2. Create a feature branch: `git checkout -b feature/your-feature`
3. Make your changes and add tests
4. Run tests: `./scripts/test.sh`
5. Submit a pull request
## 👥 Contributors
We thank all the contributors who have helped make this project better:
### 🌟 Core Contributors
- **[Naituw](https://github.com/Naituw)** - *Project Architect*
- [wayu002](https://github.com/wayu002)
- [joker535](https://github.com/joker535)
- [andrewzq777](https://github.com/andrewzq777)
- [debugmm](https://github.com/debugmm)
- [Micro66](https://github.com/Micro66)
- [qdaxb](https://github.com/qdaxb)
### 🚀 Contributors
- [junbaor](https://github.com/junbaor)
- [aheizi](https://github.com/aheizi)
- [Adam Hill](https://github.com/adamhill)
### License
This project is licensed under the Apache License 2.0. See [LICENSE](LICENSE) for details.
### Maintainers
- **Organization**: WeCode-AI Team, Weibo Inc.
- **Contact**: [GitHub Issues](https://github.com/wecode-ai/RunVSAgent/issues)
- **Website**: [https://weibo.com](https://weibo.com)
---
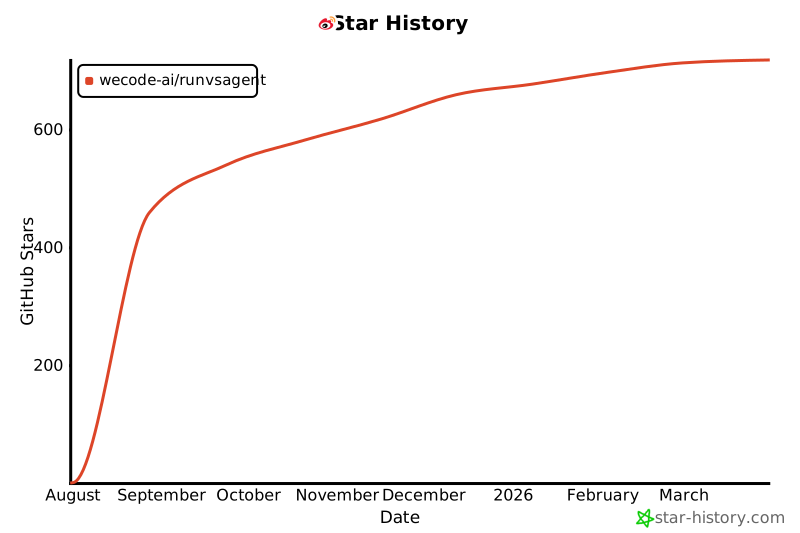
## Star History
[](https://www.star-history.com/#wecode-ai/RunVSAgent&Date)
**Made with ❤️ by WeCode-AI Team**
इंस्टॉलेशन
https://github.com/wecode-ai/RunVSAgent से यह स्किल इंस्टॉल करोयह स्किल ClawHub रजिस्ट्री पर पब्लिश नहीं है। प्रॉम्प्ट को अपने कोडिंग एजेंट — Claude Code, Cursor, Codex — में पेस्ट करें, और वह स्किल को सीधे सोर्स रिपॉज़िटरी से इंस्टॉल कर देगा।
रिपॉज़िटरी खोलें